Showing posts with label Little Miss Crafty. Show all posts

Thursday, December 15, 2011

Make Your Own Rings {Great Gift Idea!}

When I saw this post about making homemade rings out out buttons on FamilyCircle.com, I knew I had to share it for all my crafty readers out there.  These unique rings {no two are the same!} would make a great handmade holiday gift, or you could make your own custom statement pieces to wow friends and family with!


What you need:
Buttons with a metal shank {she found hers at a local shop that carries decorative vintage and new buttons; she also suggests finding buttons on Etsy}
Wire cutters or tin snips
Adjustable ring blanks {find at craft stores like Michael's}
Jewelry glue or other heavy duty adhesive

How to:
1. Snip the metal shank from the buttons, getting as close to the base as possible.
2. Apply glue to the surface of the ring blank and attach to the back of the button.
3. Set it face down to dry and cure for 24 hours (see glue label for when total adhesion and curing occurs).

Tip:
If you have a ring that’s difficult to dry face down, make a small ring of aluminum foil and rest the ring inside to support it while it dries.


Happy crafting!
xoxo
Bean

{photo credit:  familycircle.com}

Thursday, December 8, 2011

Homemade Gift Tags

This year I decided to make my own gift tags for all the presents I'll be giving.  Why?  I have no idea ~ but I've actually been having a lot of fun doing it!  I picked up a selection of Christmas-themed rubber stamps {some from the dollar bin!}, ink pads, and sparkly scrapbooking paper from Michael's.  {You could probably find similar items at Walmart ~ and don't forget to check your weekly fliers for Michael's or A.C. Moore coupons!}.  Using white cardstock I already had at home as the base of my gift tags, I've been making all sorts of festive, sparkly tags for all the gift recipients in my life!

You could whip up all your gift tags in one crafty afternoon, or do a few each day if you don't have too much time to dedicate ~ I crank out a few each night as I'm watching TV.  Check out the pics below to see the supplies I used and the different shapes, sizes, and styles of tags I've come up with so far!

Assemble your tools ~ plain cardstock for stamping and writing, sparkly or festive craft paper for backing, stamps, ink, adhesive, cropping tools, and embellishments.  {I also used paper cutting boards designed for scrapbooking, not pictured}.

 Some of my stamps {I went back and grabbed a "Merry Christmas" one and a holly-leaf one}.  Also, some of my old Creative Memories scrapbooking tools for fun edges and corners.


 Ink pads in red, green and silver, plus Glue Dots adhesive {the BEST craft adhesive, in my opinion}, a metallic silver pen and two Creative Memories wavy 'edgers' ~ you'll see how that works...


 Can't beat a little sparkle for the holidays!  {I went back and grabbed some green sparkly sheets too}.


So after I assembled my basic tools, it was time to get to work.  I didn't really plan any particular card ~ I just sort of zone out and see where my crafty side leads me.  Sometimes that yields great results, and sometimes it leaves me thinking "Well, that was a weird choice...".  Overall, when it comes to being crafty and creative, you really can't go wrong.
The first gift tag I made.  I used a Creative Memories "edger" to give the white cardstock a "scalloped" border.


 Silver pen comes out a bit too light ~ I may trace over the letters with a green or red pen to make them stand out more.  But who wouldn't want to receive a super-sparkly package like this one?!  {Glitter, glitter everywhere!}


 I used a Creative Memories "bubbles" paper punch to decorate the edge of some white cardstock.  After backing the bubble-holes with red sparkly paper and bordering the entire tag in festive green, doesn't it look like glittering Christmas ornaments are dancing across the paper?


 My favorite example of  'seeing where my crafty side leads me' ~ I used a holly garland stamp four times {once on each edge of the card} to create a "wreath" to frame my "To: / From:" section of the tag.


 Some of the final results!


I started this project last week, and I've gotten a number of tags done.  You have plenty of time to get a little creative with your gift tags, if you start now!  A piece of advice ~ stamp and embellish before you put your craft-paper backing on the tags.  Cardstock is much cheaper than scrapbooking paper, so tossing a piece that you don't like here or there isn't a big deal, but throwing away the craft paper could turn this into a much more expensive project.


Have fun, my little artists!

xoxo
Bean

Thursday, November 3, 2011

Unleashing my Inner Artist with Pottery Painting!

I'm not really an artist, per se.  I'm crafty, yes.  I love scrapbooking and doing other types of crafts.  I think I have a good eye for color and design.  But if you sat me down at an easel and expected me to paint you a masterpiece, I'm afraid you'd be pretty disappointed.   So, the crafty side of me was excited, and the I'm-not-artistically-inclined side of me was a bit apprehensive when my friend Glory {who also posted about our experience on Six and the Suburbs} and I decided to try our hand at pottery painting this summer after purchasing a Groupon deal.  We stepped into the shop with no idea what to expect;  we left with beautiful, useable ceramics!  On that first visit, Glory painted four drink coasters for her at-home "bar", and I painted a serving platter to commemorate the the hub's and my fifth wedding anniversary.

After our positive pottery painting experience, we knew personalized ceramic pieces would make great Christmas gifts for some of the people in our lives.  A few weeks ago I returned to the pottery shop to start working on gifts.  My one major requirement ~ the pieces I give to people {or create for myself} need to be useable.  There are plenty of "knick-knack" type items to paint in the shop, but I don't want to contribute to people's clutter.  I'd rather gift someone something they can actually get use out of ~ a coffee mug; a serving platter; a wine or margarita glass; a candy dish; coasters; a dish set; a flower vase; soup bowls, etc.  {All of which are items at the shop we went to}. 

I entered the shop {by myself ~ that Glory is a busy girl!} not knowing exactly who I was going to be painting for and what type of item I would be selecting.  I perused the shop, waiting for inspiration to strike.  Within minutes, I spotted a butterfly-shaped chip-and-dip-type serving dish.  My mom loves butterflies, and I'm sure she likes chips and dip {or at least entertains people who like chips and dip} ~ done!  I also selected and painted a few other items during this visit, but I don't want to take the chance of people seeing their Christmas presents in advance on here.  {My mom doesn't read this, so no worries there}.  Check out my start to finish painting process below...


The blank canvas. {The smudge on the upper right is the price written in pencil.  Anything written in pencil on the piece will burn off in the firing and glazing process; you can sketch out designs/wording on your piece and paint over the ones you like ~ anything else won't show up on your finished product}.


First things first ~ my autograph and the date, so she'll always remember when she received such an amazing, thoughtful gift {and from whom}. ;)  I also included a "handwash" reminder.


 Now you wipe off your piece with a damp sponge to remove any dust, and start painting!  I literally decided my color/design scheme as I went along.  I painted pink wings and a blue body and antenna {three coats of each, drying in between}.


 Then I decided to speckle the butterfly wings with pink and blue polka-dots.  I choose a pink and blue that were slightly darker than the ones I had used on the wings and body, staying in the same color family.  I used these little round sponges to make uniform-sized dots {they have lots of tools at the shops ~ stamps, stencils, sponges, and more}.


 Almost done!  {I also did three coats of dots, stamping each one three times with drying time in between coats}.


 The amazing ice cream that was my dinner after I finished the butterfly and before I started my next project.  I know it's not really related, but it was so delicious I had to share ~ a "Campfire" {smores} sundae from the cute ice cream shop next door; it came complete with hand-toasted marshmallows on top!  Okay, back to business...

Ta-dah!  The finished product, all shiny and bright after being fired and glazed at the shop.  {You pick it up a few days later}.


If you're in the southeastern Massachusetts area like Glory and I, check out South Shore Pottery Shop on Route 18 in Abington.  If you're not, check out pottery painting places near you ~ they're popping up everywhere. {Color Me Mine has locations all across the country and the world}.   It's something people of all ages can participate in and enjoy; it's relaxing; it can be a great social activity if you get a group of girls together to go; and it's productive ~ create pieces that you can gift to friends and family or use yourself!

Have fun, my little artists!

xoxo
Bean


Wednesday, November 2, 2011

Coming Up for the Holidays...

Woohoo!  It's November, darlings ~ the official kick-off to my favorite time of the year!  This month is all about pretty leaves, cooling weather, cozy sweaters, and utilizing apples and pumpkins any which way we can ~ culminating, of course, with a delicious Thanksgiving dinner!  December will bring fires in the fireplace and wreaths on the door, decorating trees or putting up the menorah, more baking {so much baking!}, and the best music and movies of the year!


To me, the holiday season really is the most wonderful time of the year.  I love each and every second of it, and none of it {the endless cooking, the shopping and budgeting, the crazy family get-togethers} really stresses me out.

I am so, so excited for all the things I have to share with you over the next two months!  I can't wait to share my first annual 12 Days of Christmas {Treats} list with you ~ I'll probably start those posts in December or after Thanksgiving.  {And I'm sure I'll be sharing way more than 12 recipes for goodies with you between now and New Years ~ I just like the ring of the 12 Days title, and those will probably be more Christmas-specific}.


I am also looking forward to chatting with you about all the fantastic holiday movies we'll be watching and the songs we'll be listening to.  I'm pulling together fun seasonal craft and decorating ideas that will be fun and festive, too!

The season is officially upon us, dolls ~ you can choose to embrace it or choose to avoid it or choose to just stress the whole way through.  I am going to choose to enjoy every second of it!

{Holiday} Cheers!

xoxo
Bean

{photo credits: tasteofhome.com;  countryliving.com; closetliving.com; melavilaalarilla.blogspot.com; marthastewart.com; sheknows.com}

Friday, October 28, 2011

Spiders and Ghosts and Tombstones, Oh My!


How adorable are these Scary Spiderweb Cupcakes from Betty Crocker?  Adorable, and just creepy enough!  Make these super easy, super festive cupcakes for your Halloween party this weekend!


Ingredients
1 box Betty Crocker SuperMoist devil's food cake mix
   {water, vegetable oil, and eggs called for on cake mix box}
1 container Betty Crocker Rich & Creamy vanilla frosting
3 drops red food color
4-5 drops yellow food color
1 tube {0.68 oz} Betty Crocker black decorating gel
48 large black gumdrops

Heat oven to 350 degrees {325 for dark or nonstick pans}.  Make and cool cupcakes as directed on box for 24 cupcakes.

Tint frosting with red and yellow food colors to make orange frosting.  Spread frosting over tops of cupcakes.

Squeeze circles of decorating gel on each cupcake; pull knife through gel from center outward to make web.  To make each spider, roll out 1 gumdrop and cut out 8 strips for legs; place another gumdrop on top.  Place spider on cupcake.  Store loosely covered.

Yields 24 cupcakes.


Other Betty Crocker Halloween Treats


Tombstone Cupcakes


Owl and Spider Cupcakes {although I don't know what owls have to do with Halloween...}


Friendly Ghost Cupcakes


Trick-or-Treat Brownie Cupcakes


Enjoy all the yummy treats this weekend brings you!

xoxo

Bean

Monday, October 24, 2011

Spooky Snack -- Butterfinger Eyeballs!

Looking for a yummy, unique Halloweeny sweet to serve up at your Halloween party or treat your coworkers to?  Check out these fun and funky Butterfinger Eyeballs {recipe courtesy of my dear friend Kaydee, via Razzle Dazzle Recipes}.


Butterfinger Eyeballs

Wax paper
1 cup creamy peanut butter {not all-natural}
2 Tbsp butter
2 cups powdered sugar
1 Nestle Butterfinger candy bar, chopped
2 cups Nestle Tollhouse Premier White Morsels
3 Tbsp vegetable shortening
2 packages Butterfinger BB's candies
1 small tube red decorator icing
Wooden pick or skewer for dipping


Line two baking sheets with wax paper.

Beat peanut butter and butter in a large mixing bowl until creamy.  Beat in powdered sugar until mixture holds together and is moistened.   Stir in chopped Butterfinger.  Shape into 1-inch "eyeballs".  Place on baking sheets.  Freeze for 1 hour.

Melt morsels and shortening in a large, uncovered microwave-safe bowl on MEDIUM-HIGH power for 1 minute and 30 seconds; STIR.  Morsels may retain some of their original shape.  If necessary, microwave at additional 10- to 15-second intervals, stirring until just melted.  Remove one baking sheet of frozen "eyeballs" from freezer {keep other sheet in freezer until ready to use}.

Dip one "eyeball" into melted morsel mixture using a wooden pick or skewer.  Shake off excess and return to baking sheet.  Gently press one Butterfinger BB on top of "eyeball" to make a "pupil".  Repeat procedure with remaining "eyeballs" on baking sheet.  Refrigerate until coating is set.  Repeat with remaining sheet of "eyeballs" and coating.  You may find it necessary to reheat morsel mixture before dipping second batch.  Before serving, pipe decorator icing around eyeballs to create bloodshot markings.  Store in covered container in refrigerator.  Best served cold.


xoxo
Bean

{photo credit:  Kaydee}

Wednesday, October 19, 2011

The Perfect Autumn Treat -- Caramel and Chocolate Apples!

I can't remember the last time  I had a candy apple or caramel apple.  I even made some this week, but I still can't remember the last time I ate one because my hubby whisked the 10 I made off to work to share before I could even try a bite!  He ran away with them before I even had a chance to take a picture of the finished product, so I had him take a picture on his phone and send it to me.  {I skipped the crunchy red candy-coated ones and instead made some caramel-dipped and some chocolate-covered ~ yum!}


I dipped and rolled my caramel apples first, one by one.  Then I did my chocolate ones.  If the coatings sit out for too long {especially the caramel}, they will start to solidify and won't coat the apples as smoothly.  You can reheat and restir the coatings {at 30 second intervals} as needed.

I coated about half my apples in caramel and half in chocolate.  I rolled some in crushed cookies or candy, drizzled peanut butter on some, and drizzled chocolate on some caramel apples and caramel on some chocolate ones.  Some of my apples got multiple toppings, and some just got one.  You could even leave some plain!  Let your imagination {and your stomach!} be your guide on this one ~ there are no wrong answers.


What I Used
10 apples (you want a more firm variety ~ I used Honeycrisp}
2 bags of caramels
1-2 bags of semi-sweet chocolate chips {I used about 1 1/2 bags}

Toppings
Crushed toffee candy {you can buy Heath bars already crushed ~ in my grocery store they're in the same spot as the chocolate chips}
Crushed Oreo cookies
Peanut butter

Also
Vegetable oil
Water
Popsicle sticks

1. Rinse and dry your apples.  Pull out the stems and insert popsicle sticks.

2.  Line a cookie sheet with wax paper.  For caramel-coated apples, spray the wax paper with cooking spray.

3. In a microwave-safe bowl, place unwrapped caramels and a few tablespoons of water.  Microwave for 1 minute intervals, stirring frequently, until melted and smooth.  Add more water if necessary.

4. Hold an apple by the stick and roll it in the caramel.  Use a spoon to help coat the apple if necessary.  Immediately roll in any toppings and set apple on sprayed wax paper to set.

5.  Repeat.

For chocolate-coated apples ~ in a microwave-safe bowl, melt half a bag of chocolate chips, using 30 second intervals and stirring between each interval.  When chocolate is melted and smooth, stir in a few drops of vegetable oil to thin chocolate and help it coat apples more smoothly.  Use same dipping process as caramel apples.  {Melt more chocolate as necessary}. The wax paper doesn't need to be sprayed with cooking spray.

For peanut butter drizzle ~ melt a few tablespoons of peanut butter and some vegetable oil in a microwave-safe bowl.  Scoop some up on a spoon and "flick" over/toward the apple to drizzle it, or for a more controlled drizzle, load up a pastry bag with the melted peanut butter and squeeze {just make sure peanut butter isn't too hot to handle!}

I made my apples at night and they were left out overnight to set, but they don't need to be left for that long ~ you should be good to go after an hour or so.  Just give the chocolate time to harden and the caramel time to firm up a bit {the caramel will never "harden", but you don't want it so soft that everything is sliding off as you try to eat it}.


Other topping ideas that I didn't get around to using but seem yummy ~ coconut flakes; crushed nuts; mini M&Ms; crushed chocolate chip cookies; mini chocolate chips; crushed pretzels; crumbled peppermints or candy canes.  Also, you could try melting down white baking chips or milk chocolate chips {and mixing in a bit of vegetable oil} instead of semi-sweet chocolate!

What a fun way to get in a fruit serving! ;)

xoxo
Bean

Friday, October 14, 2011

A Personalized Gift Idea -- for a Great Cause


Have you heard of Design-her Gals?  It's an adorable website where you can create personalized gifts for people {or for yourself}, designing an avatar that looks just like the person you're gifting the item to!  Once you're on their email list, you'll find they often have sales and promotions, as they do this week {the discount code is at the bottom of this post}.  They also do a lot to raise money for breast cancer research through their Gal to Gal Foundation.  Check out their website and start designing "gals" here.


On the site, you pick a gal body type to start, and then select her eye shape and color, hair style and color, outfit and accessories ~ and there are a lot of hair styles, outfits and accessories to choose from, so it really is easy to get the avatar looking exactly how you want it to.  Outfits range from army fatigues and Halloween costumes to work attire and street clothes, and everything in between.  The accessories, in my opinion, are what really add that special personalized touch ~you can have your gal holding a coffee mug, magazine, rolling pin, soccer ball, dog on a leash, art palette, cocktail, shopping bags, and more.  Or, she can wear an apron, sunglasses, a fun hat or an engagement ring.  A few years ago, they also added the option to design a guy for your gal; you can also add kids or have two gals on an item.


Once you've designed your gal, you can order products with her likeness on them, and any text that you choose; you can pick from note cards, thank you cards, recipe cards, invitations, announcements, address labels, even coffee mugs!  Over the years I have ordered so many gifts from Design-her Gals, and they're always a hit because each one is unique.  One Christmas I gave my mom recipe cards ~ "From Jean's Kitchen" was written at the top of the cards, and a woman with short brown hair wearing khakis and a cardigan, holding a rolling pin, was on the side.  I also gave my newly-engaged cousin note cards with her soon-to-be name printed at the top, and the image of a bride, holding out her left hand to display her "bling", on them.  I've ordered address labels, notecards, and gift tags for myself as well.

These products can make great Christmas or birthday gifts, and this weekend {through Sunday October 16th}, all of their stationary and paper products are 40% off!  Use the code 40PLUS at checkout to receive the discount.  Look below for more great uses for these products.

Have fun designing, gals!

xoxo
Bean


{photo credits:  designhergals.com; clotheshorseok.wordpress.com; prettybride.net; more than paper.com}

Wednesday, October 12, 2011

Pumpkin Painting!


I was inspired by an October Family Circle magazine cover to create a fun and festive Halloween centerpiece for my kitchen table.  As you know, I don't have kids yet, but I do enjoy being creative and decorating according to a theme.  This magazine cover showed a twist on traditional pumpkin decorating ~ painting instead of carving.  In less than an hour and a half {start to finish}, and for less than $20 {including materials that I can use again}, I created my own unique decor.  So if you're looking to skip the pumpkin-carving mess and do a little something different this year, read on.

I grabbed six mini pumpkins {three orange and three white} at Whole Foods at 75 cents each.  {I hear the price of pumpkins is high this year ~ I haven't bought pumpkins in several years, so I don't know this for a fact...but $4.50 for six little pumpkins sounds good to me!}  Mini pumpkins aren't edible but do last a long time before starting to rot, so you could display these for the full month of October without worry.  I debated grabbing a sugar pumpkin as well to have one larger {but not too large} pumpkin to paint too, but ended up just going with the minis.  You could paint any size pumpkin though.

I got four containers of all-purpose acrylic paint at Michael's, where they were on sale for 50 cents each {I got black, white, orange, and silver sparkle}.  I didn't have any small paintbrushes at home so I also purchased a value package of brushes for $6.99 {if only I'd had one of their frequent 40% off one item coupons!}, knowing that I'll be able to use these time and again for other craft projects.


I knew that I would want to display the pumpkins on top of dark, drapey fabric on my table.  I swung by Ocean State Job Lot {for those who don't live in the area ~ Ocean State is a bargain store that sells past-season, overstock, discontinued, and irregular products.  It is not pretty or fancy, but it does serve a purpose}.  I found a four-pack of chocolate brown cloth napkins for $2.00, which is perfect ~ I can use them to decorate for Thanksgiving too!

Drawing inspiration from both the Family Circle magazine and from my own little imagination, I painted the pumpkins in different ways ~ some got stripes painted along the vertical grooves in the pumpkins; some got polka-dots; one got the word "Boo!" scrawled across it; and two were painted black.  I covered one black-painted pumpkin with little white flecks, and the other I used a key to scratch lines into to reveal the white pumpkin color underneath.

{After paint dries, gently scratch lines with a key for a cool effect}


After letting the pumpkins dry {which did not take long}, I set up my table display.  I covered the table with a plain gray tablecloth and laid a Pottery Barn Kids Halloween table runner across it {a gift from my mother-in-law years ago}.  I stacked  two empty plastic food-storage containers upside down in the center of the table {to allow my display to have different levels}.


Then I draped one of the cloth napkins on top of the containers, bunching it up in different areas until I liked the way it looked.


Last but not least, I put the pumpkins into place, added two skeleton-decorated votive holders, and voila!  A quick and easy Halloween centerpiece.


Happy painting, dolls!

xoxo
Bean

Thursday, October 6, 2011

A Cheap and Easy Scented Candle Alternative

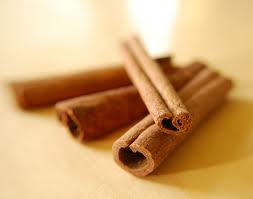
I've heard of this home-fragrance trick for years, but had never tried it out ~ simmer cinnamon sticks in water on the stove top to make your whole house smell good.  The other day while passing through the produce section of the supermarket, I spotted a package of cinnamon sticks out of the corner of my eye and grabbed it on a whim.  For a few dollars and the chance to make my apartment smell like holiday baking, why not?


Tonight while washing dishes and cleaning up, I figured I might as well try it out.  I put a shallow amount of tap water in a small saucepan and tossed in two cinnamon sticks, turning the burner on medium.  Once it achieved a good boil, I turned the flame down to low, and waited.

Now, my nose is a bit stuffed up due to seasonal allergies, but lo and behold, less than ten minutes later I could definitely detect the scent of cinnamon wafting across the kitchen.  And did it smell good!  After about 20 minutes or so, I added a bit more water to the pan {I assume if the water boils all the way down, you'll end up getting a charred-cinnamon smell, which doesn't seem nearly as appealing}.  Although cinnamon has a decidedly spicy taste,  it was giving off an intense sweet aroma ~ almost a bit too sweet.  I shook some powdered nutmeg and cloves, which have much earthier scents, into the pan ~ and a dash of ginger just for good measure.  The house smelled like Thanksgiving baking in no time!

I am a devout scented-candle burner, and I probably will never give that up.  I just love my apartment to smell fresh and welcoming, and I change scents with the seasons.  But it is nice to now have an inexpensive, easy, and unique alternative to make my house smell delicious!  Any other ideas for scenting the house this way?  Perhaps a few drops of vanilla extract or lemon extract in a pot of water?  I'll test it out another day!

xoxo
Bean


{photo credit: apartmenttherapy.com}